
cPanel is one of the most widely used web hosting control panels, providing an easy-to-use interface for website management. One of its essential features is the ability to create, edit, and delete packages in cPanel. Packages allow hosting providers to allocate specific resources to different user accounts, streamlining the process of managing multiple websites or customers. This blog post will guide you through the steps to add, edit, and remove packages in cPanel, focusing on best practices and tips for efficient hosting management.
Table of Contents
What Are Packages in cPanel?
Packages in cPanel refer to predefined sets of resources that can be assigned to hosting accounts. These resources include disk space, bandwidth, email accounts, databases, and other features. Instead of manually configuring these settings for each account, hosting providers can create packages with specific limits and easily apply them to new accounts. This not only saves time but also ensures consistency in resource allocation.
Why Use Packages?
Using packages offers several benefits:
- Efficiency: Create a set of predefined resources that can be applied to multiple accounts, reducing the need for manual configuration.
- Consistency: Ensure that all accounts under the same package have identical resource limits, reducing the risk of errors or discrepancies.
- Scalability: Easily manage accounts by upgrading or downgrading them to different packages as needed.
- Control: Set specific limits on resources to prevent any single account from overusing server resources, which could affect other users.
Packages are especially useful for web hosting companies, resellers, and system administrators who manage multiple cPanel accounts.
How to Add a Package in cPanel
Creating a package in cPanel is straightforward, and it allows you to define the resources and limits for your accounts. Follow these steps to add a package:
Step 1: Log in to WHM
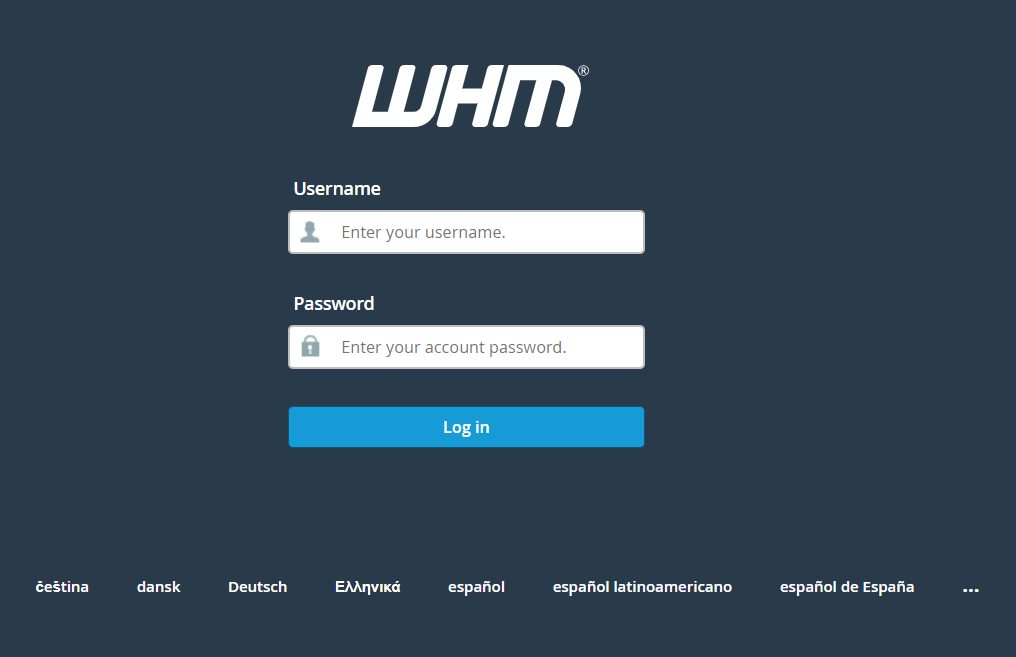
To manage packages, you need to access WHM (Web Host Manager), which is the administrative interface for cPanel. Log in using your WHM credentials.
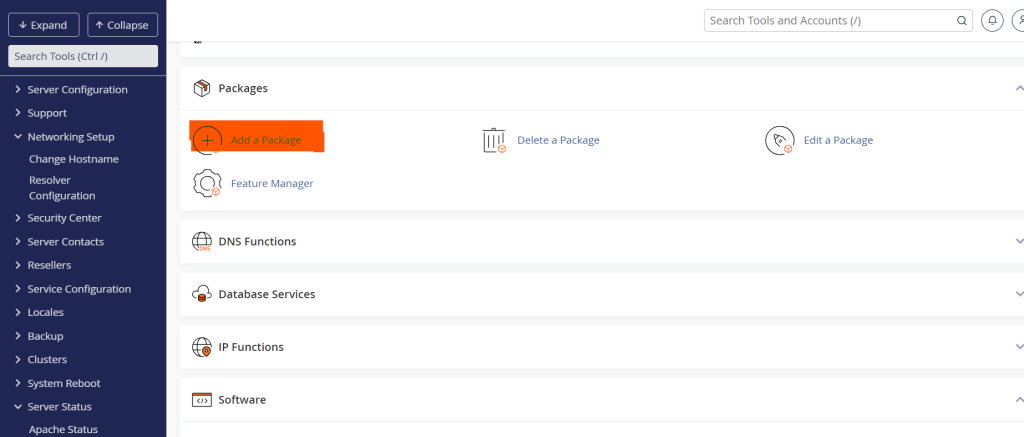
Step 2: Navigate to the “Add a Package” Section
Once logged in, go to the “Packages” section on the WHM dashboard. Click on “Add a Package” to start creating a new package.
Step 3: Define the Package Name
Choose a unique name for your package. The package name should reflect its purpose or the resources it offers (e.g., “Basic,” “Premium,” “Reseller”).
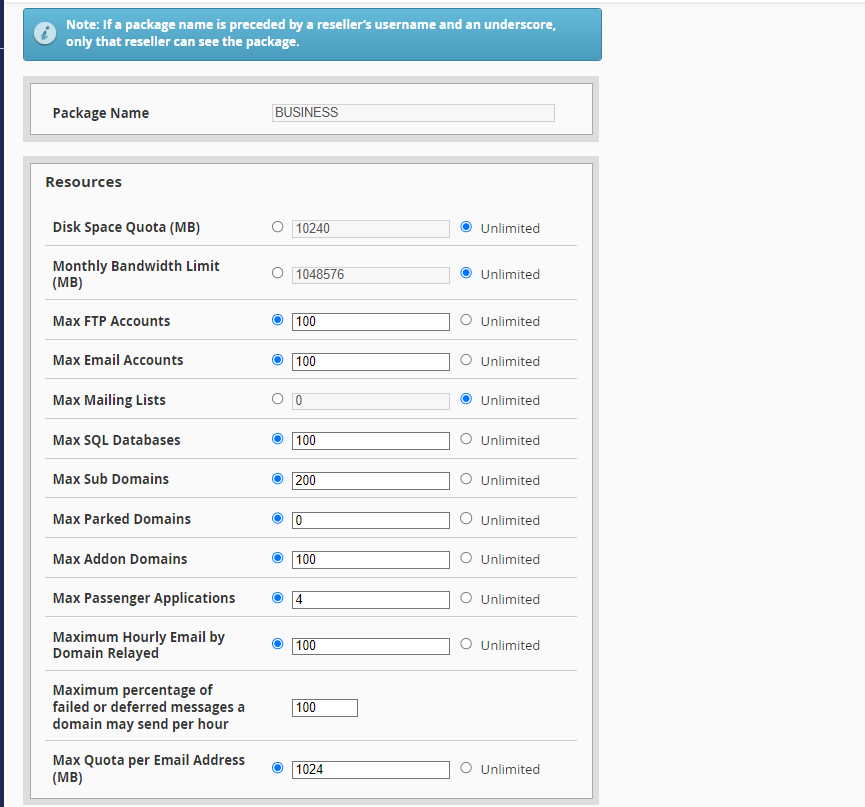
Step 4: Set Resource Limits
Here, you’ll define the limits for various resources:
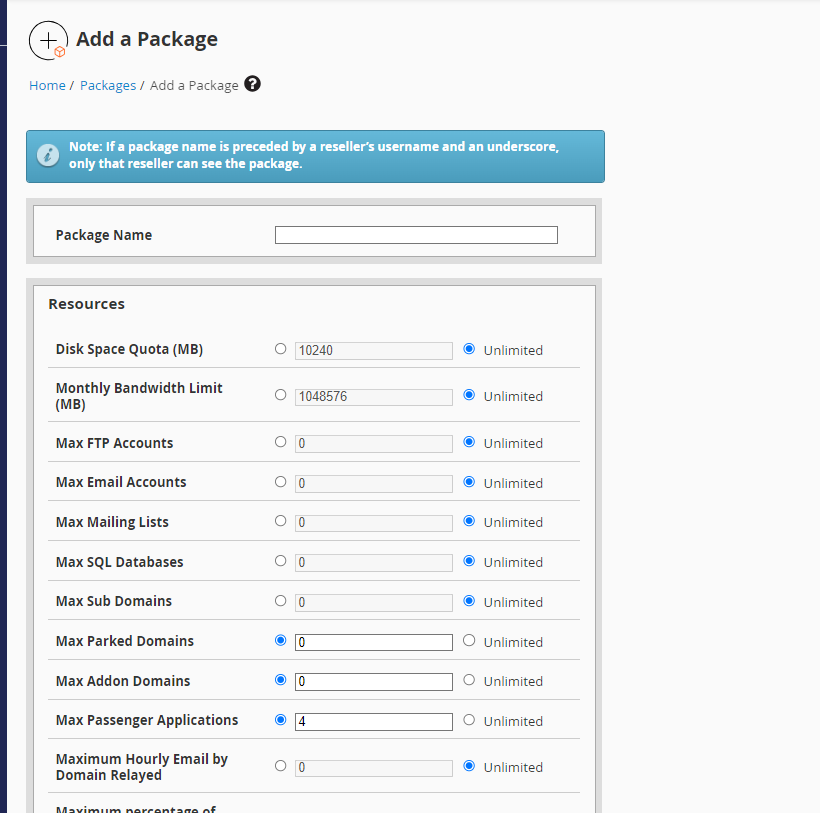
- Disk Quota (MB): Specify the amount of disk space the account can use.
- Monthly Bandwidth (MB): Set a limit on the data transfer allowed per month.
- Max FTP Accounts: Define how many FTP accounts the user can create.
- Max Email Accounts: Set a limit on the number of email accounts.
- Max Databases: Determine how many MySQL databases the user can create.
- Max Subdomains: Set a limit on the number of subdomains.
- Max Parked Domains: Specify how many parked domains can be created.
- Max Addon Domains: Define the number of addon domains allowed.
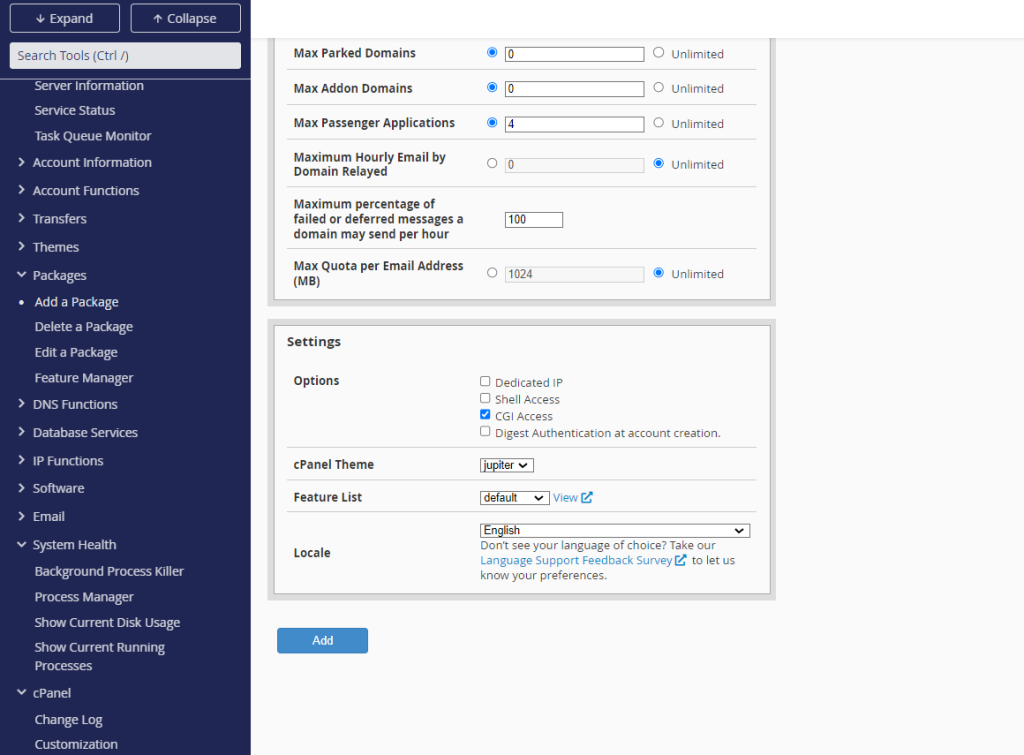
Additionally, you can configure other settings such as CGI access, Shell access, and whether the package allows overselling.
Step 5: Define Feature List
Choose a feature list to determine which features and options will be available to accounts using this package. Feature lists control access to various cPanel tools and functions.
Step 6: Save the Package
Once you’ve configured all the settings, click on the “Add” button to save your new package. It will now appear in the list of available packages and can be assigned to new or existing accounts.
How to Edit a Package in cPanel
Editing a package allows you to modify the resource limits or features for existing accounts. Here’s how to do it:
Step 1: Log in to WHM
Access WHM using your administrator credentials.
Step 2: Navigate to the “Edit a Package” Section

In the “Packages” section, click on “Edit a Package.” You will see a list of all the packages you have created.
Step 3: Select the Package to Edit
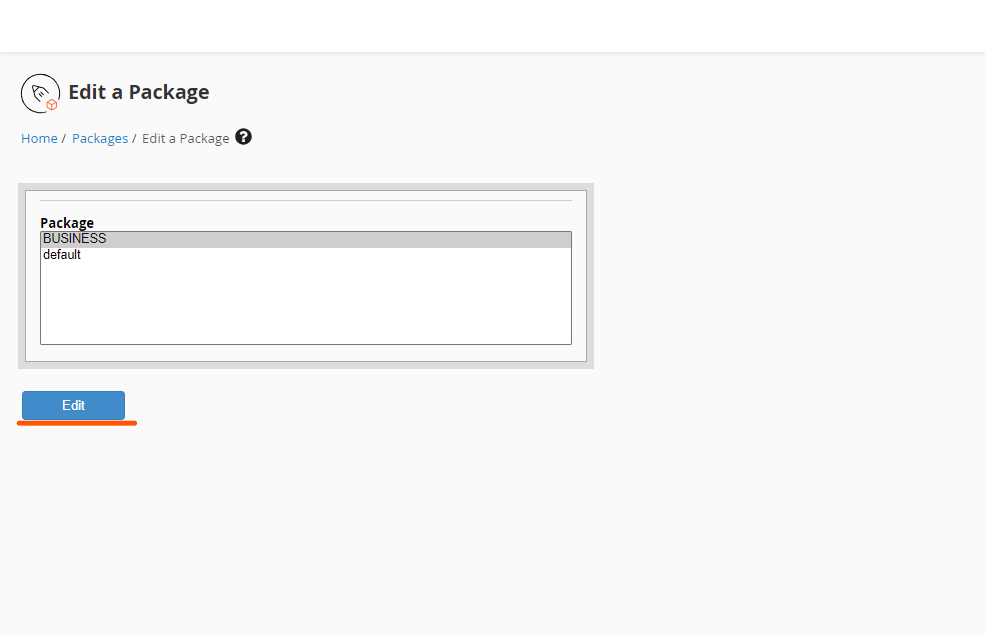
Choose the package you want to modify and click “Edit.”
Step 4: Modify Resource Limits and Settings
Update the resource limits, feature list, or any other settings as needed. Be mindful of how these changes might affect accounts already using this package.
Step 5: Save the Changes
Once you’re satisfied with the changes, click “Save.” The updated settings will apply to all accounts assigned to this package.
How to Remove a Package in cPanel
Removing a package is necessary when it is no longer in use or needed. Follow these steps:
Step 1: Log in to WHM
As always, start by logging in to your WHM interface.
Step 2: Navigate to the “Delete a Package” Section
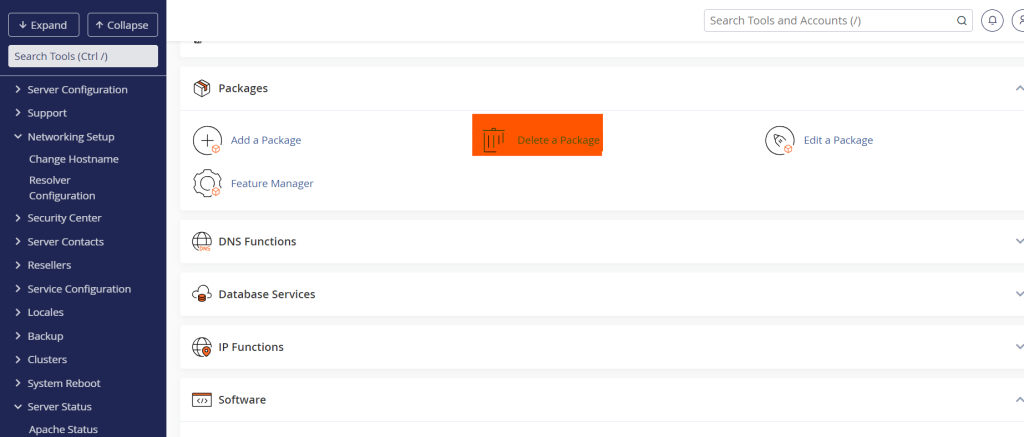
In the “Packages” section, click on “Delete a Package.”
Step 3: Select the Package to Remove
You will see a list of all your existing packages. Select the one you wish to delete.
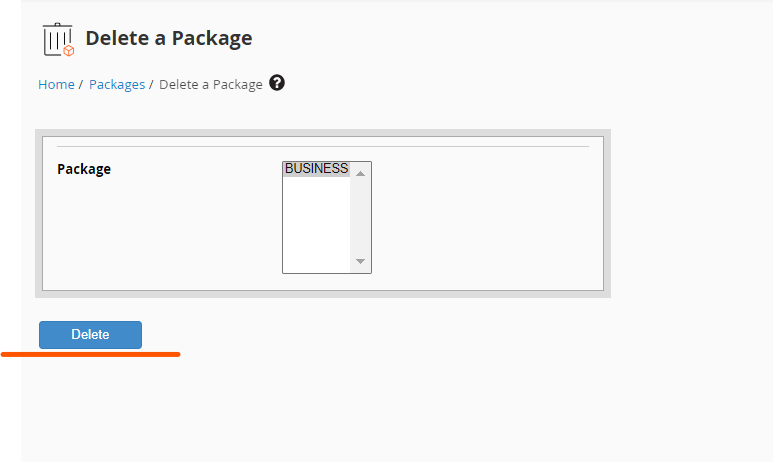
Step 4: Confirm the Deletion
Click the “Delete” button to remove the package. Be cautious—this action cannot be undone. Ensure that no active accounts are using the package before you delete it.
Best Practices for Managing Packages
Managing packages efficiently is crucial for maintaining a stable hosting environment. Here are some best practices to consider:
- Create Packages Based on Needs: Tailor your packages to meet the needs of different user segments. For example, create separate packages for personal websites, small businesses, and e-commerce platforms.
- Monitor Resource Usage: Regularly review the resource usage of accounts to ensure that packages are appropriately configured. Adjust resource limits if accounts frequently hit their limits.
- Use Descriptive Package Names: Choose names that clearly describe the package’s purpose, making it easier for you and your team to manage accounts.
- Update Packages as Needed: As your hosting environment evolves, update your packages to reflect new technologies or changes in user requirements.
- Avoid Overloading the Server: Be cautious when setting resource limits. Ensure that your server can handle the total resources allocated across all accounts.
- Leverage Feature Lists: Customize feature lists to provide or restrict access to specific cPanel features, ensuring users only see what they need.
Common Issues and Troubleshooting
While managing packages is generally straightforward, you may encounter a few issues. Here’s how to address them:
- Package Not Appearing in List: If a newly created package doesn’t appear in the list, refresh the page or log out and back into WHM. Ensure that the package was correctly saved.
- Unable to Delete Package: You cannot delete a package if it is still assigned to any active accounts. Make sure all accounts are either moved to a different package or terminated before attempting deletion.
- Package Changes Not Applied: If changes made to a package are not reflected in user accounts, check that the accounts are indeed assigned to the correct package and that no custom settings override the package limits.
Conclusion
Managing packages in cPanel is an essential aspect of hosting administration, enabling you to efficiently allocate resources and control account limits. By following the steps outlined in this guide, you can confidently add, edit, and remove packages to ensure a smooth and well-organized hosting environment.
Remember to regularly review your packages and update them to meet the evolving needs of your users. With proper management, packages can greatly enhance the scalability and performance of your hosting services.