Email aliases in Plesk allow you to create alternative email addresses that forward messages to a primary account. This can be useful for managing various email identities or forwarding emails to one inbox without setting up multiple accounts. Here’s a step-by-step guide to help you add email aliases in Plesk.
Table of Contents
What is an Email Alias?
An email alias is an additional email address that forwards incoming messages to a primary email account. It’s helpful for handling emails sent to different names (like info@domain.com or support@domain.com) without creating multiple inboxes.
Benefits of Using Email Aliases
- Simplicity: Manage multiple email identities under one primary account.
- Cost-Efficiency: No need to set up and maintain multiple email accounts.
- Better Organization: Easily categorize emails based on alias addresses.
Steps to Add an Email Alias in Plesk
Here’s how to set up an email alias in Plesk:
Step 1: Log In to Plesk
- Access your Plesk control panel by entering your login URL in a browser.
- Log in with your administrator credentials.
Step 2: Navigate to the Mail Section

- From the Plesk dashboard, find and click on Mail from the left-side menu.
Step 3: Choose the Email Account

- In the Mail section, select the domain where you want to create the email alias.
- Click on the email address that will serve as the primary account for the alias.
Step 4: Add an Email Alias
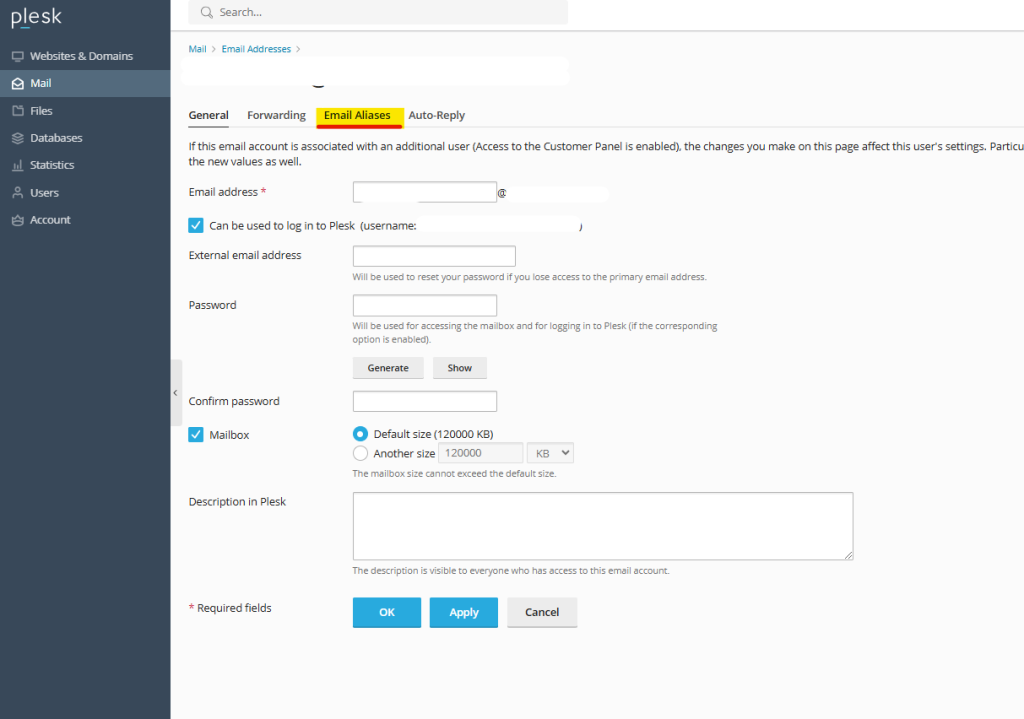
- After selecting the email account, look for the Email Aliases option.
- Click on Add Alias (or similar option), and enter the alias you want to create.For example, if your main account is
admin@domain.com, you could add aliases likecontact@domain.comorsales@domain.com.
Step 5: Save Changes
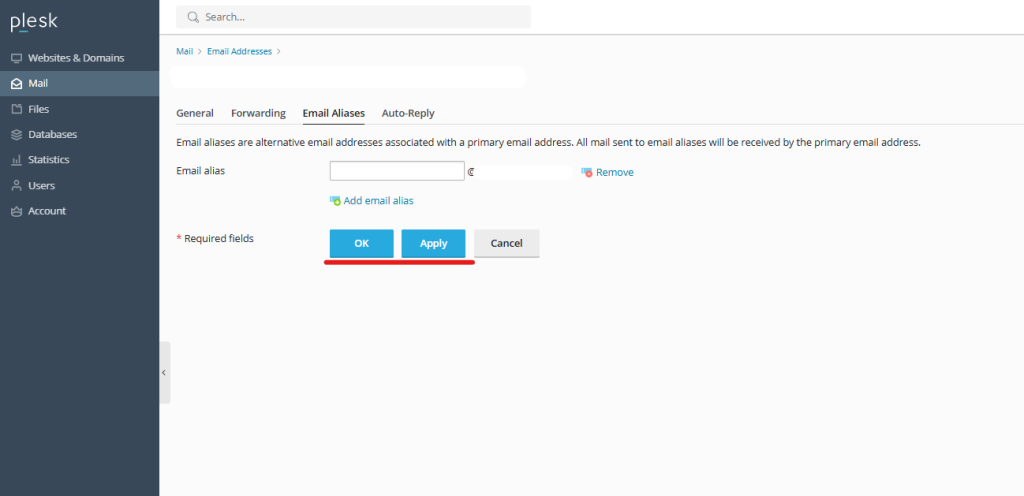
- Once you’ve entered the alias, click OK or Save to apply the changes.The alias is now created and will start forwarding emails to the primary account immediately.
Managing and Deleting Email Aliases
- You can return to the Email Aliases section at any time to edit or delete an alias.
- Removing an alias simply stops emails from being forwarded to the primary account.
Testing the Email Alias
To ensure that the alias works as expected:
- Send a test email to the new alias address.
- Check if the email arrives in your primary account inbox.
Additional Tips for Using Email Aliases
- Separate Tasks: Use aliases for different functions like
billing@domain.comorsupport@domain.comto easily manage various types of inquiries. - Spam Protection: Avoid sharing your primary email and use an alias instead to reduce spam in your main inbox.
- Limit Aliases: Although you can create multiple aliases, check if your hosting plan has a limit.
Conclusion
Adding email aliases in Plesk is a straightforward way to manage multiple email addresses under a single inbox, improving your communication flow and organization. By following these simple steps, you can enhance your email setup and make your work process more efficient. If you’ve any clarification, you need to contact your service provider.