ConfigServer Security & Firewall (CSF) is a popular firewall application designed for Linux servers, and when integrated with cPanel, it offers robust security for managing network traffic. One of the key tasks when setting up CSF is allowing or blocking specific port numbers, which is crucial for ensuring that your server can communicate effectively while still maintaining a strong security posture. This guide will walk you through the steps to allow a port number in CSF on a cPanel server.
Table of Contents
What is CSF?
CSF is a comprehensive firewall application that not only controls network access but also provides login detection, alerting, and other security measures to safeguard your server. Integrated with cPanel, it allows web hosting administrators to manage server security directly from the control panel.
Why Open Ports?
Ports are communication endpoints used by various services and applications to send and receive data. By default, CSF blocks most ports to protect your server from unauthorized access. However, there are situations where you need to allow specific ports to enable certain services like SSH, FTP, or custom web applications. Allowing the necessary ports ensures that your server can function properly without unnecessary restrictions.
Step-by-Step Guide to Allow a Port in CSF on cPanel
Step 1: Log into WHM (Web Host Manager)
To start, log into your Web Host Manager (WHM) account with root privileges.
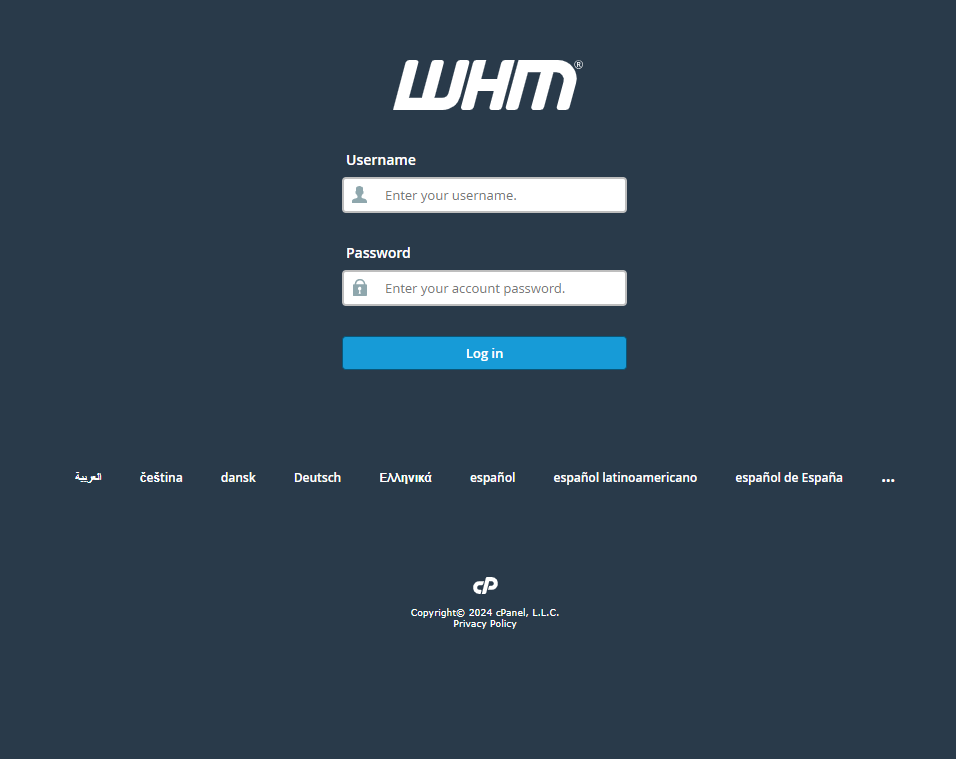
- Open your web browser and navigate to https://your-server-ip:2087/.
- Enter your root username and password.
Once logged in, you will have access to the full range of server management tools available in WHM.
Step 2: Access the CSF Interface
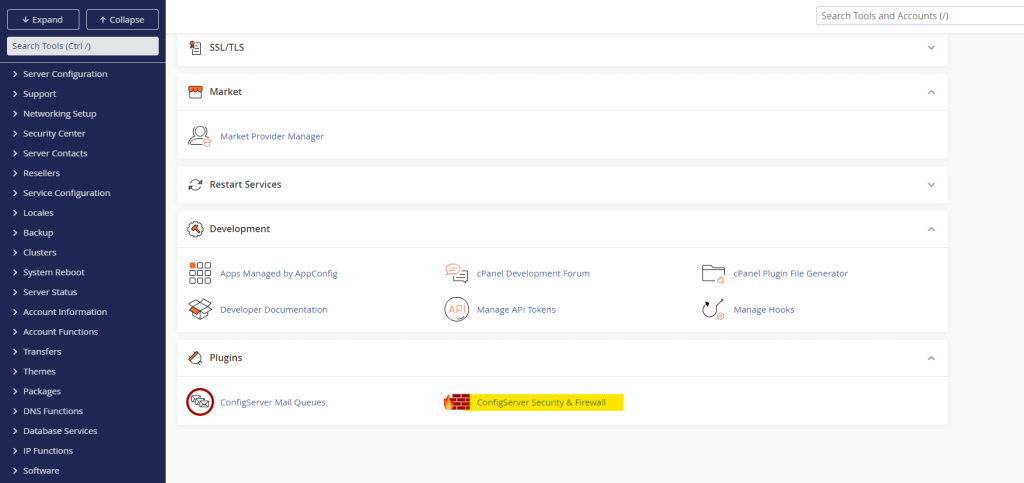
- In the WHM dashboard, search for “ConfigServer Security & Firewall” using the search bar located on the left-hand side.
- Click on ConfigServer Security & Firewall under the Plugins section.
This will open the main CSF configuration interface.
Step 3: Locate the Firewall Configuration Settings

- In the CSF interface, click on Firewall Configuration.
- Scroll down to the section labeled IPv4 Port Settings. This is where you can configure the allowed inbound (TCP_IN, UDP_IN) and outbound (TCP_OUT, UDP_OUT) ports.
Step 4: Add the Port Number to the Allowed List
To allow a specific port, you need to add it to the appropriate configuration setting. Follow these steps:
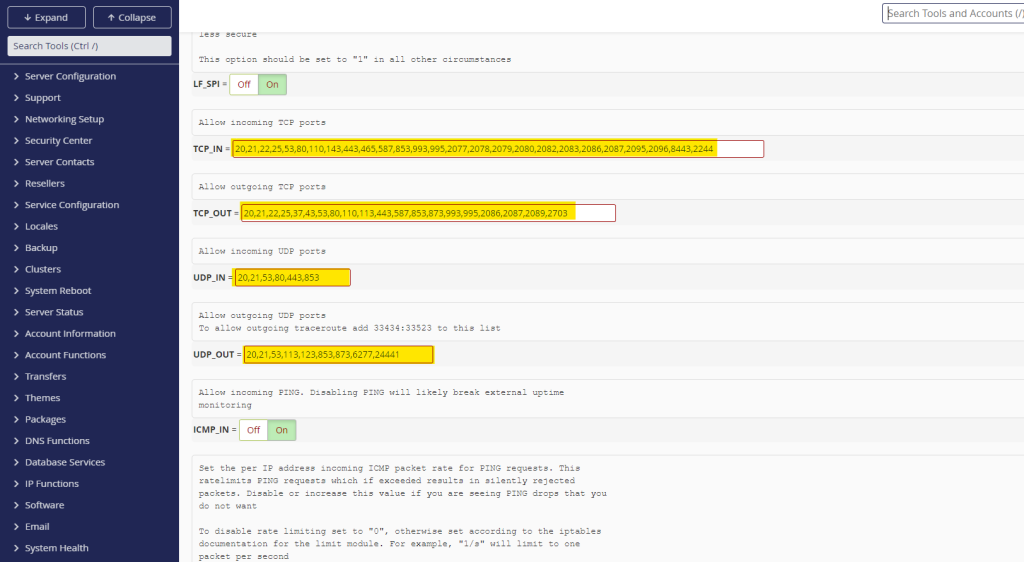
- For Incoming Traffic (TCP_IN or UDP_IN):
- Locate the
TCP_INorUDP_INfield. - Add the port number you wish to allow to the list, separated by commas (e.g.,
22,80,443,1234).
- Locate the
- For Outgoing Traffic (TCP_OUT or UDP_OUT):
- Locate the
TCP_OUTorUDP_OUTfield. - Add the port number to the list, again separated by commas if multiple ports need to be added.
- Locate the
Ensure that the port number is added to the correct list based on whether the traffic is inbound or outbound.
Step 5: Save Your Changes
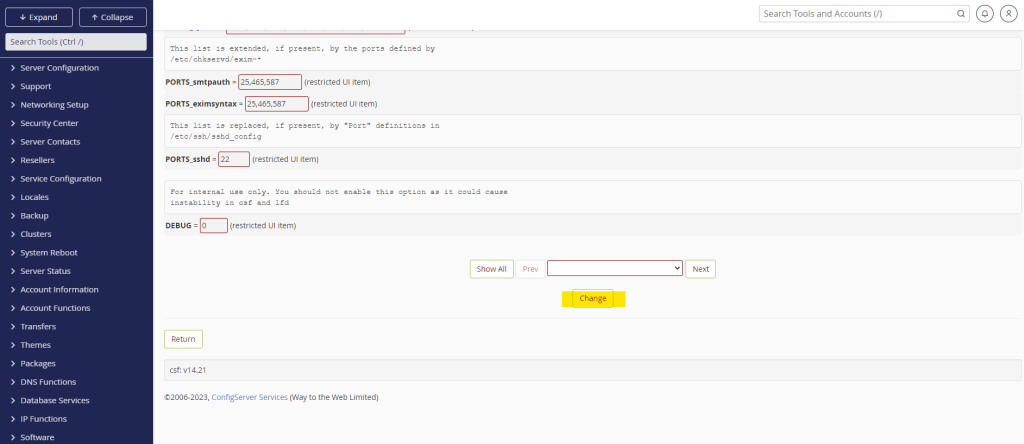
- Scroll down to the bottom of the configuration page.
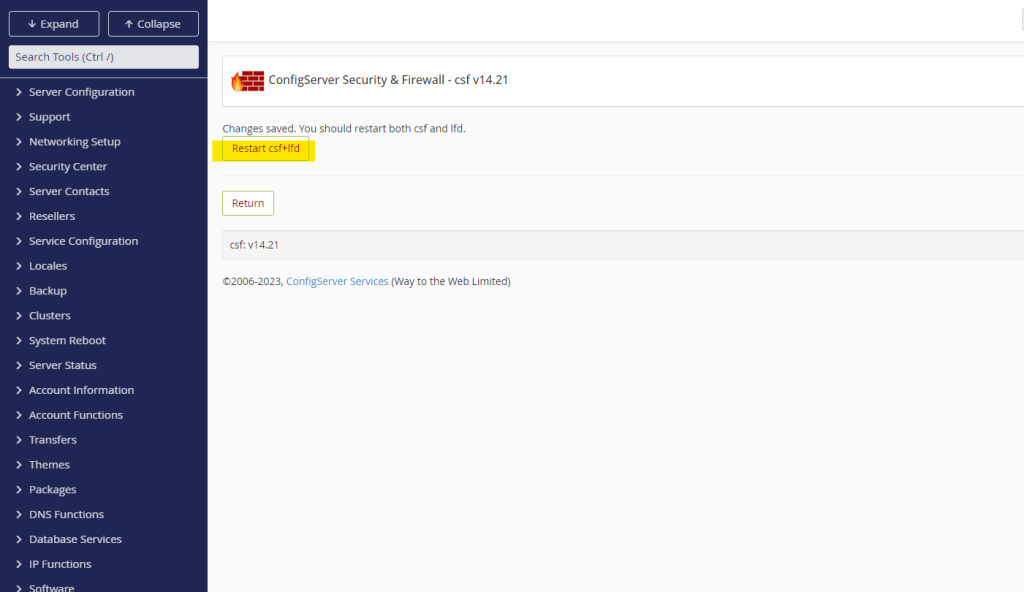
- Click on Change to save your modifications.
- After saving, you will be prompted to restart the CSF firewall to apply the changes. Click on Restart csf+lfd to restart the firewall.
Step 6: Verify the Port is Open
Once CSF has restarted, it’s important to verify that the port is open and accessible. You can do this by using tools like telnet, nc, or online port checkers to ensure that the server is accepting connections on the allowed port.
Common Use Cases for Allowing Ports
- SSH Access (Port 22): By default, SSH operates on port 22. If you’ve changed the SSH port to a custom port, you need to ensure that CSF allows the new port number.
- HTTP/HTTPS Traffic (Ports 80 and 443): Web servers like Apache and Nginx use ports 80 and 443 for HTTP and HTTPS traffic, respectively. These ports need to be open for your website to be accessible to users.
- FTP (Port 21): If you are using FTP for file transfers, you need to allow port 21.
- Custom Application Ports: Many applications require specific ports to be open for communication, such as gaming servers, email servers (e.g., port 25 for SMTP), or database services (e.g., port 3306 for MySQL).
Troubleshooting Common Issues
- Port Still Blocked: If a port appears to be blocked after adding it to CSF, ensure that there are no other firewall rules (e.g., iptables or another firewall) that may be overriding CSF settings. Also, double-check that you’ve restarted CSF after making changes.
- Service Not Responding: If the service associated with the port isn’t responding, verify that the service is running and properly configured to listen on the allowed port.
- Connection Timeouts: Ensure that your server’s network settings, such as DNS resolution and routing, are correctly configured to allow traffic on the specified port.
Conclusion
Allowing a port in CSF on a cPanel server is a critical task for ensuring that your server can communicate effectively while maintaining security. By following the steps outlined in this guide, you can safely and efficiently open the necessary ports to support your server’s operations. Remember to always monitor your server’s traffic and review firewall rules regularly to keep your server secure.