
Additional administrator accounts in the Plesk Admin Panel offer a secure and efficient way to manage server tasks collaboratively. This feature is especially useful for teams or businesses, allowing multiple users to access administrative functions with their own unique login credentials. In this blog post, we’ll provide step-by-step instructions for creating additional administrator accounts in Plesk and highlight the key benefits of using this feature.
Table of Contents
Why Add Additional Administrator Accounts?
- Enhanced Security: Each administrator can have a unique username and password, reducing the risk of security breaches caused by shared credentials.
- Role Management: Assign specific roles or permissions to different administrators, limiting access to sensitive areas of the panel.
- Efficient Collaboration: Multiple accounts allow team members to work simultaneously, improving productivity and task distribution.
- Activity Tracking: Track individual activities for better accountability and troubleshooting.
Steps to Create Additional Administrator Accounts in Plesk
Follow these steps to set up additional administrator accounts in the Plesk Admin Panel:
Step 1: Log in to the Plesk Admin Panel
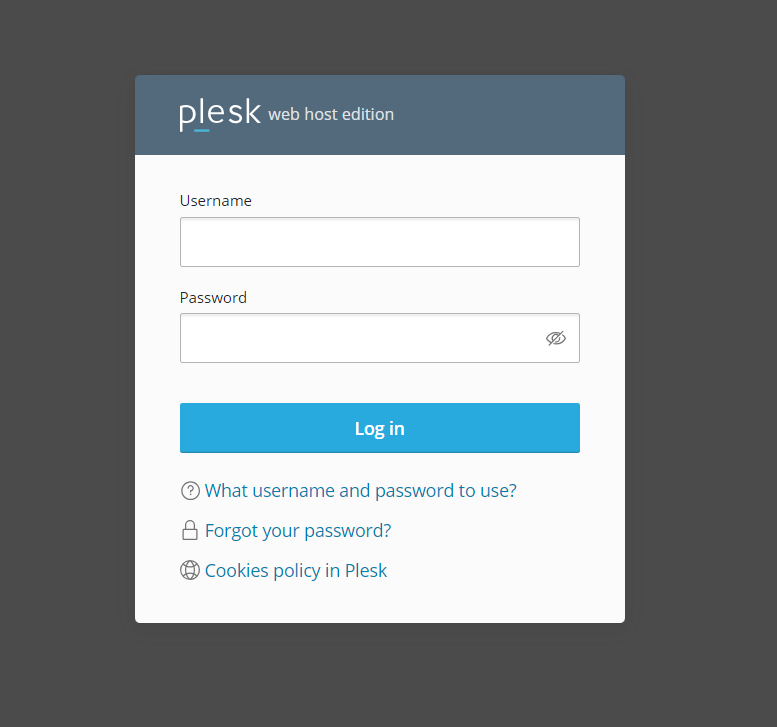
- Open your web browser and navigate to the Plesk login page.
- Enter your administrator credentials.
- Click Log In to access the panel.
Step 2: Navigate to User Management
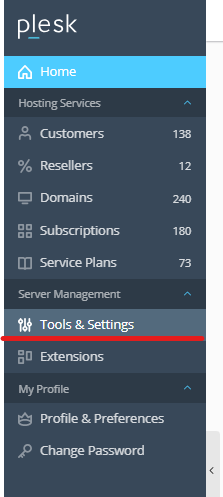
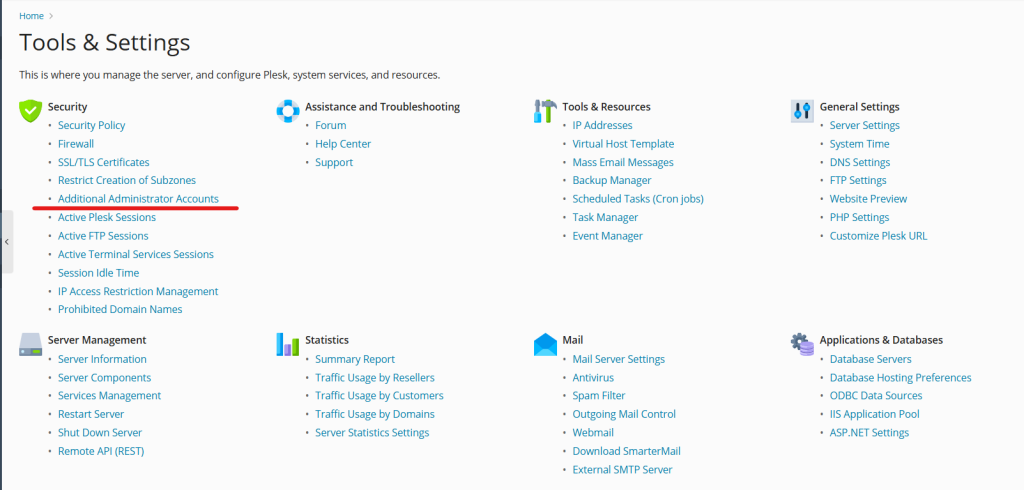
- In the Plesk Admin Panel, locate the Tools & Settings option in the main menu.
- Click Additional administrator accounts to view the list of existing accounts.
Step 3: Add a New Administrator Account
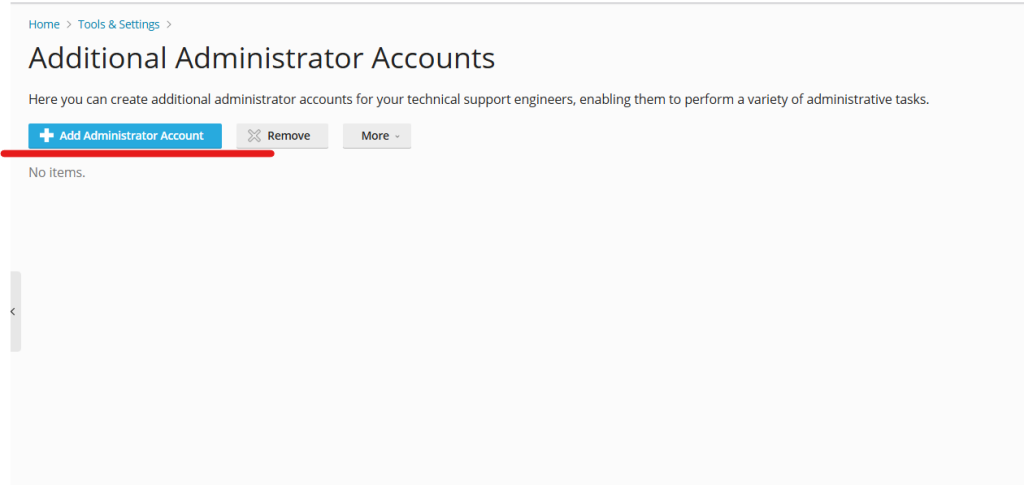
- Click the Add Administrator Account button, usually located at the top of the user management page.
- Fill in the required details for the new account:
- Contact Name: Enter the full name of the new administrator.
- Email Address: Provide a valid email address for the account holder.
- Username: Choose a unique username for the account.
- Password: Create a strong password. Ensure it meets security requirements such as a mix of uppercase, lowercase, numbers, and special characters.
Step 4: Assign Permissions
- In the User Role section, select Administrator to give the new user full access to the panel.
- Optionally, you can customize permissions by assigning specific roles if you don’t want the user to have complete access.
- Review the permissions to ensure they align with the user’s responsibilities.
Step 5: Finalize and Save
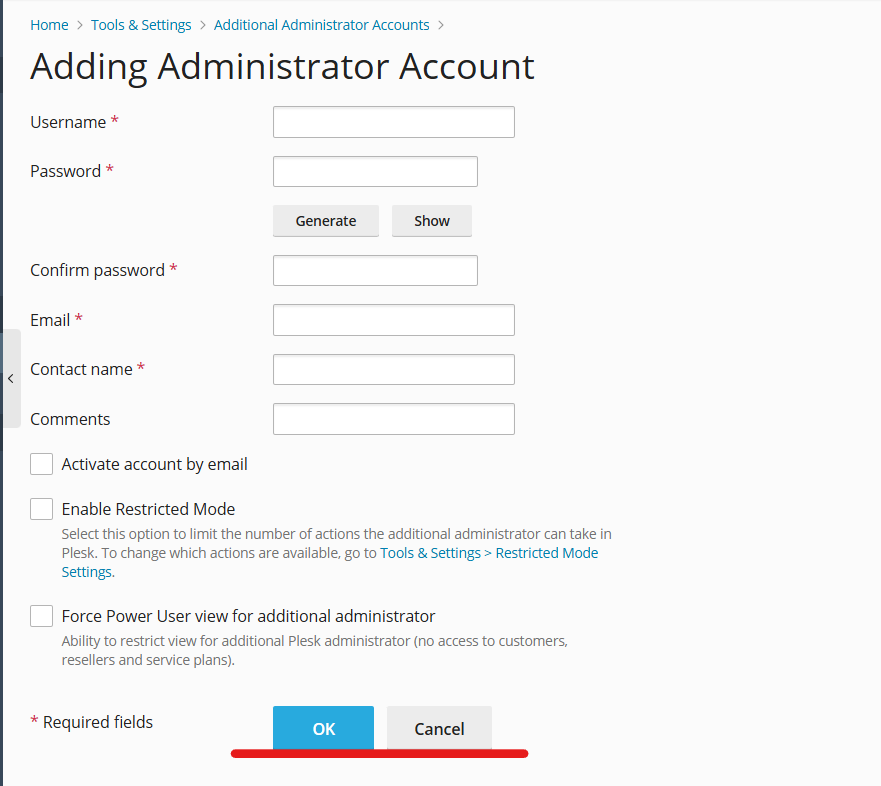
- After filling out all the fields and assigning permissions, click OK or Save to create the account.
- The new administrator account will now appear in the user list.
Editing or Deleting Administrator Accounts
If you need to modify or remove an administrator account:
- Navigate back to the Users section.
- Select the account you want to edit or delete.
- Choose Edit to update the details or permissions or select Remove to delete the account.
Best Practices for Managing Administrator Accounts
- Use Strong Passwords: Ensure all administrator accounts have robust passwords to protect against unauthorized access.
- Enable Two-Factor Authentication (2FA): Add an extra layer of security by enabling 2FA for administrator accounts.
- Regularly Review Permissions: Periodically review user roles and permissions to maintain optimal security.
- Revoke Inactive Accounts: Disable or delete accounts that are no longer in use to reduce potential vulnerabilities.
Conclusion
Creating additional administrator accounts in the Plesk Admin Panel is a straightforward process that enhances security, improves collaboration, and allows for efficient management of hosting services. By following the steps outlined above and adhering to best practices, you can ensure a secure and well-organized environment for your team.
If you have any questions or need further assistance with Plesk, feel free to reach out to your hosting provider or consult the Plesk documentation.