
Plesk is a popular web hosting control panel that offers administrators comprehensive tools to manage and monitor server activities. One of its key features is the Action Log in Plesk, which provides detailed records of actions performed within the panel, helping in troubleshooting and tracking changes. This blog post will guide you through the process of downloading the Action Log in Plesk Admin Panel.
Table of Contents
What Is the Action Log in Plesk?
The Action Log is a feature in Plesk that logs all significant operations performed by administrators and users. It includes details about:
- User activities (e.g., adding or deleting domains).
- System events (e.g., updates, service restarts).
- Errors and warnings (e.g., failed operations).
Downloading the Action Log can help in:
- Troubleshooting issues with server operations.
- Auditing server activities for security or compliance purposes.
- Tracking changes made by users or administrators.
Step-by-Step Guide to Download the Action Log in Plesk
Step 1: Log in to Plesk Admin Panel
- Open your web browser and navigate to the URL of your Plesk Admin Panel.
- Log in using your administrator credentials.
Step 2: Access the Tools & Settings Section
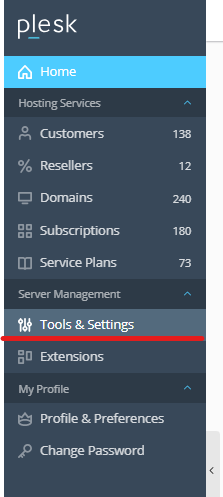
- Once logged in, go to the left-hand navigation menu.
- Click on Tools & Settings under the Server Management section.
Step 3: Locate the Action Log
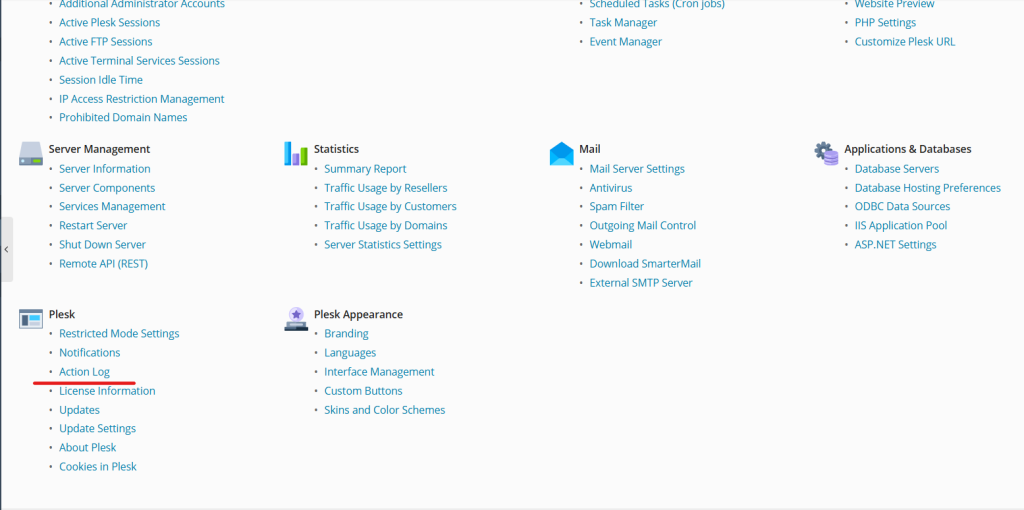
- In the Tools & Settings page, look for the Monitoring or Logs section.
- Click on Action Log to view the records.
Step 4: Customize the Log View (Optional)
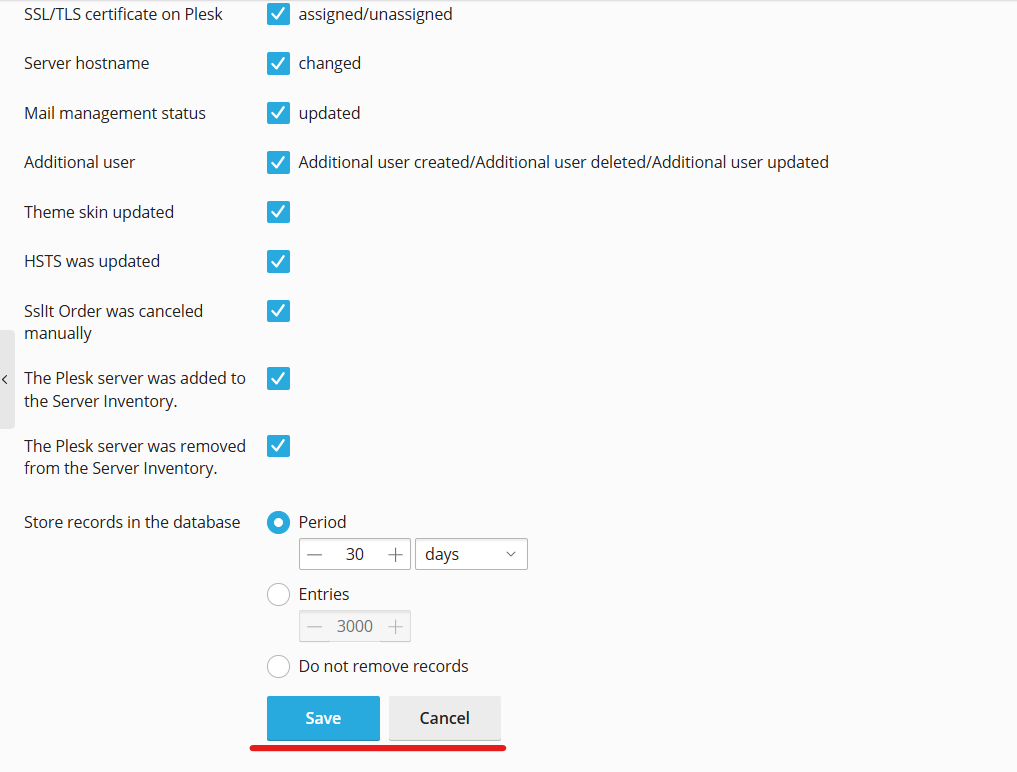
Before downloading, you can filter the log entries based on specific criteria:
- Date Range: Select a custom range to download logs for a specific period.
- User or IP Address: Filter actions performed by a specific user or originating from a specific IP address.
- Action Type: Choose specific activities such as domain management, email configuration, or server updates.
To apply filters:
- Use the search bar or dropdown filters available at the top of the Action Log page.
- Click Apply Filters to refine the results.
Step 5: Download the Action Log
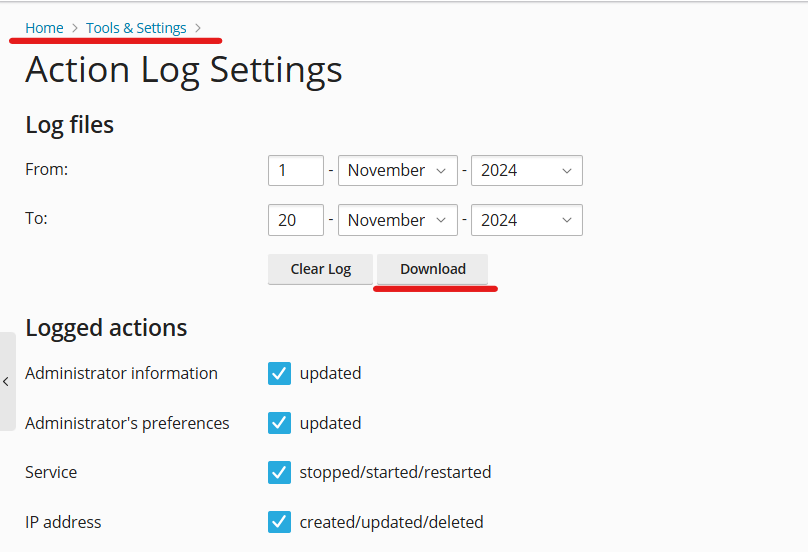
- Look for the Export or Download button on the Action Log page.
- Click on it, and Plesk will prompt you to save the log file.
- Choose a location on your computer and save the file.
Note: The log file is typically downloaded in a plain text (.txt) or comma-separated values (.csv) format for easy readability and analysis.
Step 6: Analyze the Action Log
Once downloaded, open the log file using a text editor (like Notepad) or a spreadsheet application (like Microsoft Excel) to review the recorded actions.
Benefits of Downloading the Action Log
Downloading the Action Log can:
- Help you track unauthorized changes or suspicious activities.
- Provide evidence for debugging issues or disputes.
- Ensure compliance with security audits and policies.
Tips for Managing Action Logs
- Regularly Monitor Logs: Schedule periodic checks of the Action Log to identify potential issues early.
- Backup Logs: Save important log files securely for future reference or compliance purposes.
- Automate Monitoring: Use monitoring tools or scripts to analyze log entries for specific keywords or patterns automatically.
Conclusion
Downloading the Action Log in Plesk Admin Panel is a straightforward yet powerful process that enhances server management and security. By understanding how to use and interpret these logs, you can ensure that your server runs smoothly and stays secure.
For further assistance or troubleshooting, consult the Plesk Documentation or reach out to your hosting provider’s support team.