Enable the auto-reply emails in Plesk can be a helpful tool for informing your contacts of your unavailability or providing automated responses when you’re unable to respond right away. This feature allows you to send an automatic reply to anyone who emails you, letting them know you’ll respond soon or providing additional information they might need. Let’s walk through the steps for enabling the auto-reply feature in Plesk.
Table of Contents
Why Use Auto-Reply in Plesk?
Auto-replies are especially useful for:
- Informing clients of temporary absences, such as vacations or out-of-office situations.
- Providing instant responses with basic information about your business.
- Reducing response time expectations when you are busy.
Step-by-Step Guide to Enable the Auto-Reply in Plesk
Here’s how to set up the auto-reply feature in the Plesk control panel:
1. Log In to Plesk
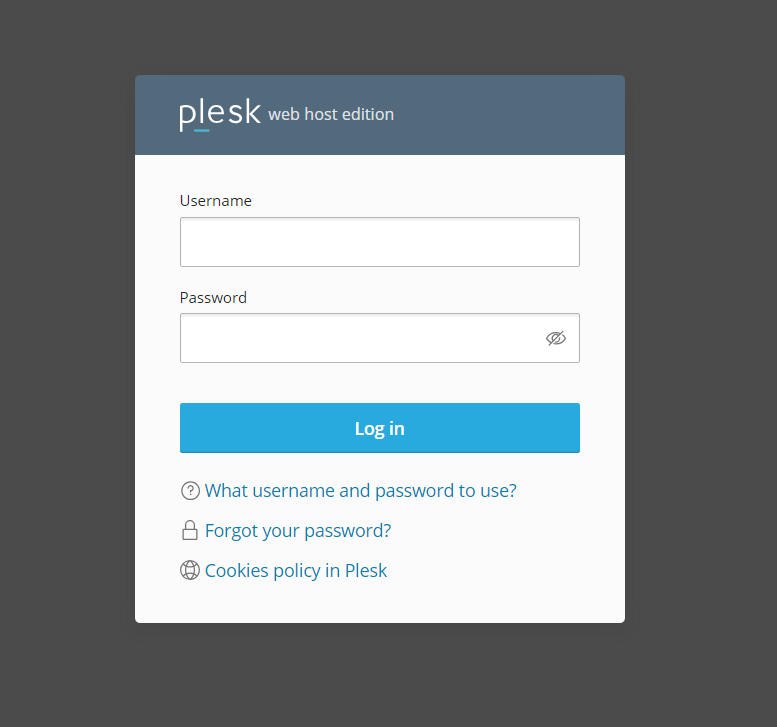
- Open your Plesk control panel by entering your login URL in a web browser.
- Enter your username and password, then click Log In.
2. Navigate to the Mail Tab

- Once logged in, go to the Mail tab in the left sidebar.
- This section shows all the email accounts associated with your domain.
3. Select the Email Account

- Find the email account for which you want to enable the auto-reply feature.
- Click on the account name to open the settings.
4. Open the Auto-Reply Settings
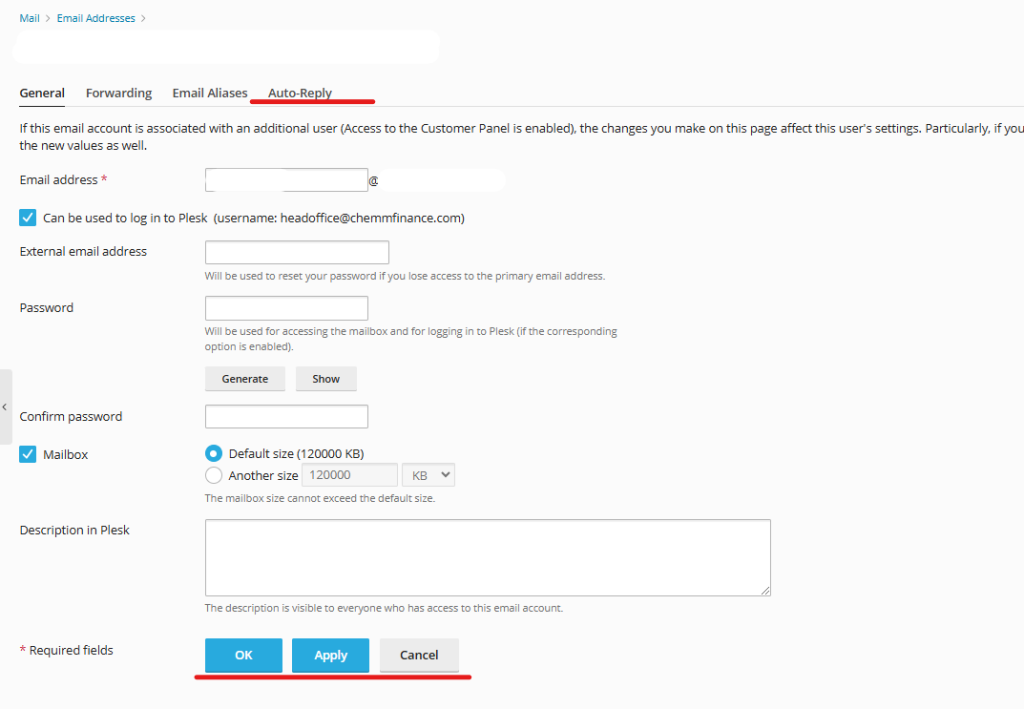
- In the email account settings, look for an option labeled Auto-Reply or Automatic Reply.
- Click on it to open the configuration panel.
5. Enable Auto-Reply
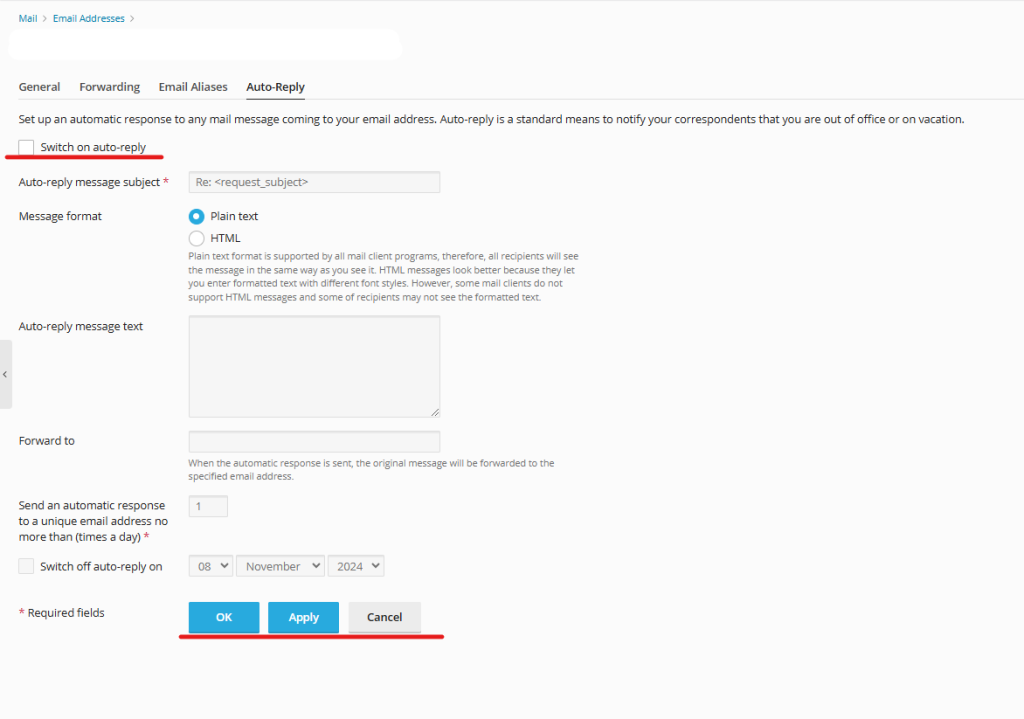
- Check the box that says Switch on auto-reply to enable this feature.
- Once enabled, you’ll see additional settings to configure the message details.
6. Configure Auto-Reply Message
- Subject: Set the subject line for your auto-reply. A common subject might be “Out of Office” or “Welcome to your New Hosting Service.”
- Message: Write the body of the auto-reply message. Include relevant information, such as your expected response time or alternate contact details if necessary.
- Charset: Leave this as the default, typically UTF-8, unless you need a specific character set.
7. Set the Auto-Reply Conditions
- Send Frequency: Choose how often the auto-reply should be sent to the same email address (e.g., once a day).
- End Date: Set an end date for the auto-reply if it’s a temporary message.
- Additional Options: You may see options to exclude certain email addresses or domains, if needed.
8. Save the Settings
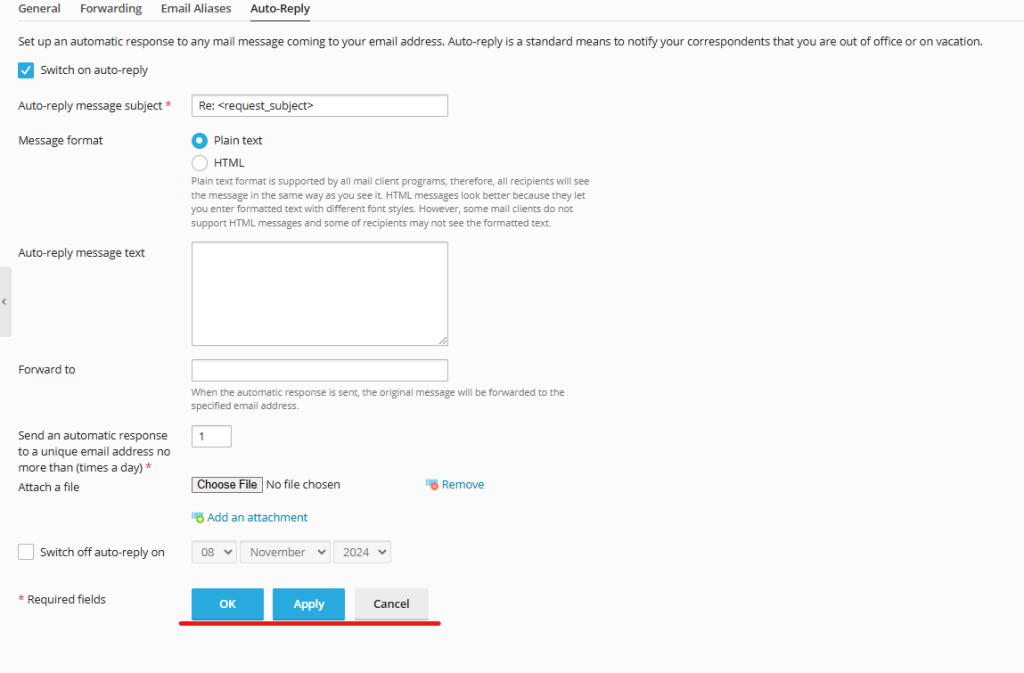
- After entering all the details, click OK or Apply to save the settings.
- Plesk will now activate the auto-reply for this email account based on the conditions you configured.
Testing the Auto-Reply Function
Once the auto-reply is enabled, it’s a good idea to test it by sending an email to the configured address. Check if the automated response is sent back as expected. Adjust any settings if needed.
Managing and Disabling Auto-Reply
- To modify the auto-reply settings, return to the email account’s Auto-Reply section in Plesk and make any changes as necessary.
- To disable it, simply uncheck the Switch on auto-reply box and save the settings.
Conclusion
The auto-reply feature in Plesk is an effective way to keep your contacts informed and provide immediate responses when you’re unavailable. By following these simple steps, you can configure personalized automatic replies for any email account hosted on Plesk. This can be especially helpful for managing client expectations and maintaining a professional response flow even when you’re away from your inbox.
With this setup, you can ensure that your contacts always know when to expect a response, keeping communication smooth and professional. If you face any difficulties, you can contact your service provider.