The Plesk Admin Panel is a versatile tool for managing hosting services, domains, and user accounts. One essential administrative function is the ability to suspend or activate user accounts. This feature is vital for maintaining security, ensuring compliance with hosting policies, and managing server resources efficiently. Whether you’re addressing overdue payments, security concerns, or temporarily disabling services, Plesk makes it simple to suspend and reactivate accounts as needed.
In this blog post, we’ll explore step-by-step instructions on how to suspend and activate accounts in the Plesk Admin Panel, alongside best practices for using these features effectively.
Table of Contents
Why Suspend or Activate Accounts?
Suspending accounts can serve multiple purposes, including:
- Managing overdue payments by restricting access to services.
- Preventing potential misuse in case of a security breach.
- Conserving server resources for inactive users.
Reactivating accounts ensures users can regain access when the issues are resolved, restoring their services seamlessly.
Step-by-Step Guide to Suspending an Account in Plesk
Log in to the Plesk Admin Panel
Open your Plesk Control Panel URL in a web browser.
Enter your admin username and password to log in.
Navigate to the Account Management Section
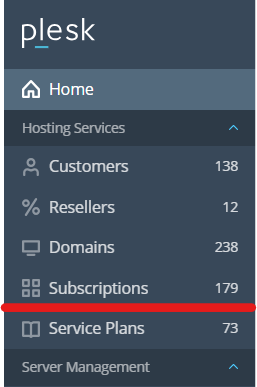
Once logged in, locate the “Customers” or “Subscriptions” tab from the left-hand menu, depending on whether you manage individual users or groups.
Search for the Account
Use the search bar to quickly locate the specific account or subscription you want to suspend.
Access the Account Settings
Click on the customer or subscription name to access its detailed settings.
Suspend the Account
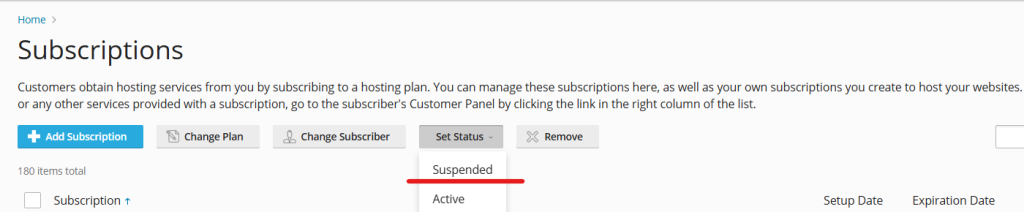
Look for the “Suspend” button, typically located at the top or within the actions menu.
Confirm your action in the prompt that appears.
The account will now be marked as suspended, and associated services, such as websites and email, will no longer be accessible to the user.
Step-by-Step Guide to Activating an Account in Plesk
Log in to the Plesk Admin Panel
Use your admin credentials to log in.
Locate the Suspended Account
Navigate to the “Customers” or “Subscriptions” tab.
Filter the accounts to view only those that are suspended.
Open the Account Details
Select the account you want to reactivate and click on its name to open the settings
Activate the Account
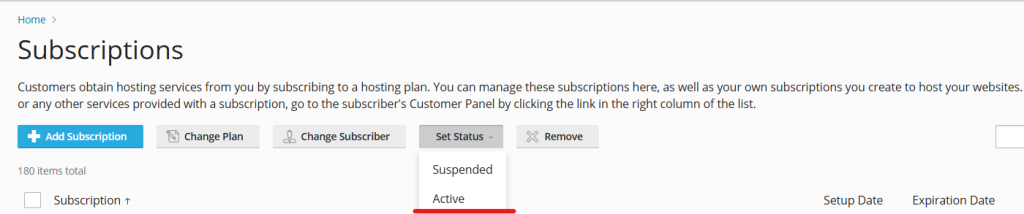
Click on the “Activate” button.
Confirm your action. The account will be reinstated, restoring all previously suspended services.
Best Practices for Managing Account Suspension and Activation
- Communicate with Users
- Always notify users before suspending their accounts, providing clear reasons and instructions to resolve the issue.
- Document Reasons for Suspension
- Maintain a log of why an account was suspended. This helps in tracking and resolving disputes efficiently.
- Ensure Timely Activation
- Once the issue is resolved, activate the account promptly to minimize disruption to the user’s services.
- Set Clear Policies
- Define and communicate your suspension policies to users during onboarding, including payment terms and acceptable usage guidelines.
- Monitor Suspended Accounts
- Regularly review suspended accounts and decide whether to reactivate or terminate them permanently.
Troubleshooting Common Issues
- Unable to Suspend an Account
Ensure that you have the necessary administrative privileges. Check for any dependent accounts or resources preventing suspension. - Services Not Restored After Activation
Verify that the hosting services and associated configurations are correctly re-enabled. Restart services if necessary. - Account Still Accessible After Suspension
Double-check that all relevant services, such as FTP, email, and websites, are disabled in the suspension settings.
Conclusion
Suspending and activating accounts in Plesk is a straightforward yet powerful way to manage hosting services effectively. Whether you’re dealing with security concerns, overdue payments, or inactive users, these tools provide flexibility and control. By following the steps outlined in this guide, you can ensure that account management is handled efficiently and professionally, enhancing the overall experience for both administrators and users.
Take advantage of Plesk’s user-friendly interface and robust features to manage your hosting environment with ease!